
 347-331-7600
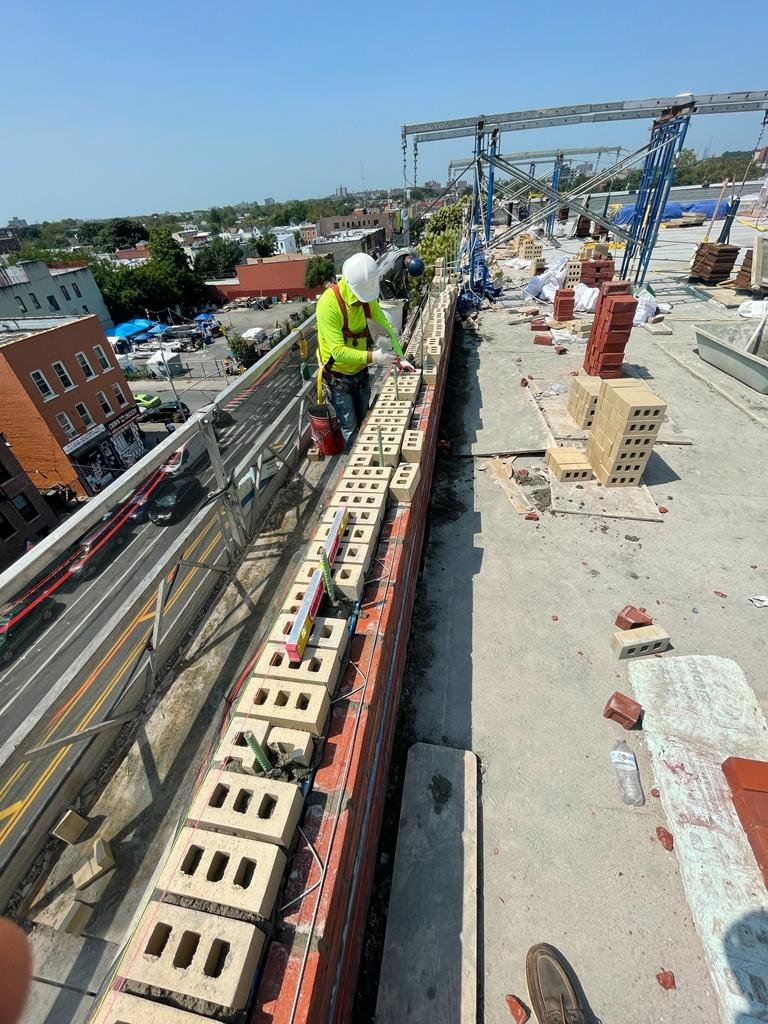
 Parapet walls are important architectural and protective features of residential and commercial buildings throughout New York City. Extending above the roofline, they help define the building’s exterior structure while providing protection around roof edges and supporting important weatherproofing details. However, years of exposure to rain, snow, strong winds, freezing temperatures and environmental pollutants can gradually weaken masonry materials. When deterioration becomes extensive, repairing individual sections may no longer provide a reliable solution, making complete replacement or reconstruction necessary.
For NYC property owners, parapet wall replacement NYC requires careful planning, appropriate materials and professional masonry workmanship. The process involves more than removing damaged bricks and installing new ones. Proper assessment, controlled demolition, structural preparation, rebuilding, coping installation and waterproofing all contribute to the performance of the finished structure. Understanding each stage can help property owners make informed decisions and prepare for a successful restoration project.
Step 1: Inspecting the Existing Parapet Wall
The first stage of any replacement project is a detailed inspection of the existing parapet wall. A qualified professional evaluates the masonry condition, mortar joints, coping stones, flashing, roof connections and surrounding building components to understand the extent of deterioration.
Common problems include extensive brick damage, loose masonry, deep cracks, deteriorated mortar, leaning sections and recurring water penetration. The inspection also helps determine whether localized repairs are sufficient or whether complete reconstruction is necessary.
When the building has experienced recurring leaks, identifying the moisture source is particularly important. Property owners can learn more about what causes water intrusion in NYC buildings and why correcting underlying water entry points is essential before completing exterior restoration work.
Step 2: Planning the Project and Arranging Necessary Approvals
Once the inspection is complete, the next step involves preparing a suitable replacement plan. This includes defining the damaged sections, selecting construction materials, establishing the work sequence and determining the necessary access and safety arrangements.
Depending on the building, project scope and applicable NYC requirements, permits, professional design documents and Department of Buildings filings may be necessary. A registered design professional can help determine the required approvals and construction details.
For buildings subject to facade safety requirements, property owners should also understand the NYC Local Law 11 and FISP inspection requirements. Proper planning helps coordinate the restoration work with relevant building safety obligations and reduces the likelihood of avoidable project delays.
Step 3: Setting Up the Work Area and Safety Protection
Parapet replacement often involves working at elevated roof edges, where falling masonry, construction materials and tools can create serious hazards. Before demolition begins, the contractor establishes appropriate safety measures for workers, occupants and pedestrians.
Depending on the building and project conditions, preparations may include scaffolding, suspended access equipment, temporary barriers, overhead protection and controlled material handling arrangements. Roofing surfaces, nearby windows and other vulnerable building components should also be protected from construction debris.
A properly organised work area allows contractors to carry out demolition and rebuilding activities while reducing unnecessary disruption to the property and surrounding areas.
Step 4: Removing the Damaged Parapet Masonry
After the necessary preparations, deteriorated masonry is carefully removed according to the approved project scope. This may involve taking down damaged bricks, weakened mortar, defective coping and other components that cannot be safely retained.
Demolition should be controlled rather than performed indiscriminately. Contractors need to protect adjoining walls, roof assemblies and structural connections while removing unstable materials. Debris must also be handled and disposed of appropriately.
The extent of removal depends on the condition of the existing parapet. Some projects require reconstruction of the entire wall, while others involve replacing specific sections. Where surrounding brickwork also requires attention, appropriate brick masonry repair services in Queens can help restore deteriorated areas and maintain continuity with the existing building exterior.
Step 5: Preparing the Base and Rebuilding the Parapet Wall
Once damaged materials have been removed, the remaining structure is examined and prepared for reconstruction. Contractors check the supporting masonry, roof-edge connections and other relevant details before installing new materials.
The replacement parapet is then rebuilt using suitable masonry materials, such as compatible bricks, concrete masonry units or other specified products. Mortar selection, wall alignment, bonding patterns and reinforcement details must follow the approved design and the requirements of the particular building.
Proper workmanship is essential throughout this stage. The new wall should have appropriate stability, consistent masonry joints and correctly executed connections. Material compatibility is also important because differences in movement, moisture absorption and durability can affect the long-term performance of the reconstructed parapet.
Step 6: Installing New Coping Stones and Flashing
Coping forms the protective upper covering of a parapet wall. It helps direct rainwater away from the masonry and reduces the amount of moisture entering through the top surface. During replacement, damaged coping should be replaced or reset using suitable materials and installation details.
The coping system should provide an appropriate slope, secure connections and properly sealed joints. Drip edges can also help direct water away from the wall face.
Flashing is another important component. It helps manage water at vulnerable roof-to-wall connections and other locations where moisture could enter the building envelope. Correct flashing installation, including suitable laps and terminations, helps protect the roof assembly and surrounding masonry from water penetration.
Step 7: Applying Waterproofing and Sealing Vulnerable Areas
After the masonry, coping and flashing have been installed, the relevant connections and exposed areas are checked for moisture protection. Depending on the project design, suitable waterproofing membranes, sealants and other compatible protective materials may be used.
The objective is to prevent water from entering through open joints, defective connections and vulnerable roof-edge details. Waterproofing should complement the masonry construction rather than serve as a substitute for correcting defective brickwork, drainage or flashing.
This stage is especially important for NYC buildings exposed to frequent rainfall, snow and seasonal temperature fluctuations. Proper water management helps reduce the risk of recurring leaks, mortar deterioration and premature masonry damage.
Step 8: Conducting the Final Inspection and Quality Checks
The final stage involves reviewing the completed parapet wall to confirm that the replacement work follows the approved plans and project requirements. Contractors check masonry alignment, mortar joints, coping placement, flashing connections and visible waterproofing details.
The surrounding roof and facade areas should also be examined for construction-related damage or unfinished work. Any identified defects should be addressed before the project is considered complete.
For buildings with wider facade deterioration, professional facade restoration and FISP repair in Queens can help property owners address related exterior maintenance and safety concerns.
Why Professional Parapet Wall Replacement Matters in NYC?
Parapet reconstruction requires knowledge of masonry materials, roof-edge details, exterior waterproofing and building safety practices. An improperly rebuilt wall can develop recurring cracks, loose masonry, defective coping connections and moisture problems.
Working with an experienced masonry contractor helps ensure that the replacement plan considers the building’s existing conditions and applicable construction requirements. Professional workmanship also helps coordinate demolition, material installation, flashing and waterproofing as parts of one complete restoration project.
Conclusion
Parapet wall replacement is a detailed construction process that requires proper inspection, careful demolition, suitable masonry materials and reliable waterproofing. From preparing the work area and rebuilding the wall to installing coping and checking the final connections, every stage contributes to the stability and weather resistance of the finished structure.
For NYC property owners, addressing severely deteriorated parapets through properly planned reconstruction can help protect the roofline, surrounding masonry and building occupants. Excel masonry contractor NY provides masonry repair, parapet wall reconstruction and exterior restoration solutions for residential and commercial properties. If your building requires parapet replacement or professional masonry assessment, contact the team to discuss the project requirements and request an estimate.